Today’s quick tip is intended for photographers who need to achieve a larger depth of field by using large aperture numbers. Capture One offers an easy to use tool that helps combat the effect of diffraction.
What is diffraction and why should we afraid of it? One of the definitions says:
Diffraction is a phenomenon in which the wave behind the obstacle “bends” from its original direction, thus reaching the area of the geometric shadow of the obstacle. This process can be observed for all types of waves – light, sound, waves on the water – especially when their wave passes through an aperture whose width is comparable to the wavelength.
I am not good at physics, so I will definitely not try to explain it further. All we need to know is that when light passes through the aperture of a lens, it may change a direction, resulting in a blurred image. The smaller the aperture, the more noticeable the effect – and using a larger f-number, which may be handy in macro or landscape photography, makes the aperture of a lens smaller.
You can test the effect of diffraction yourself by placing the camera on a tripod and taking a series of the photos on different apertures in aperture-priority mode and with the same ISO. A good subject is a paper with text, where the blur caused by diffraction will be clearly visible. If you don’t want to try it yourself, you can either trust me, or you can use this online calculator. The smaller the sensor, or the higher the resolution, the greater is the impact at the same f-number.
However, today’s tip is about Capture One, which offers a quick aid as part of its three-stage sharpening. It is an inconspicuous checkbox named Diffraction Correction, which you can find in Lens Correction palette located in the Lens tab of tools sidebar:
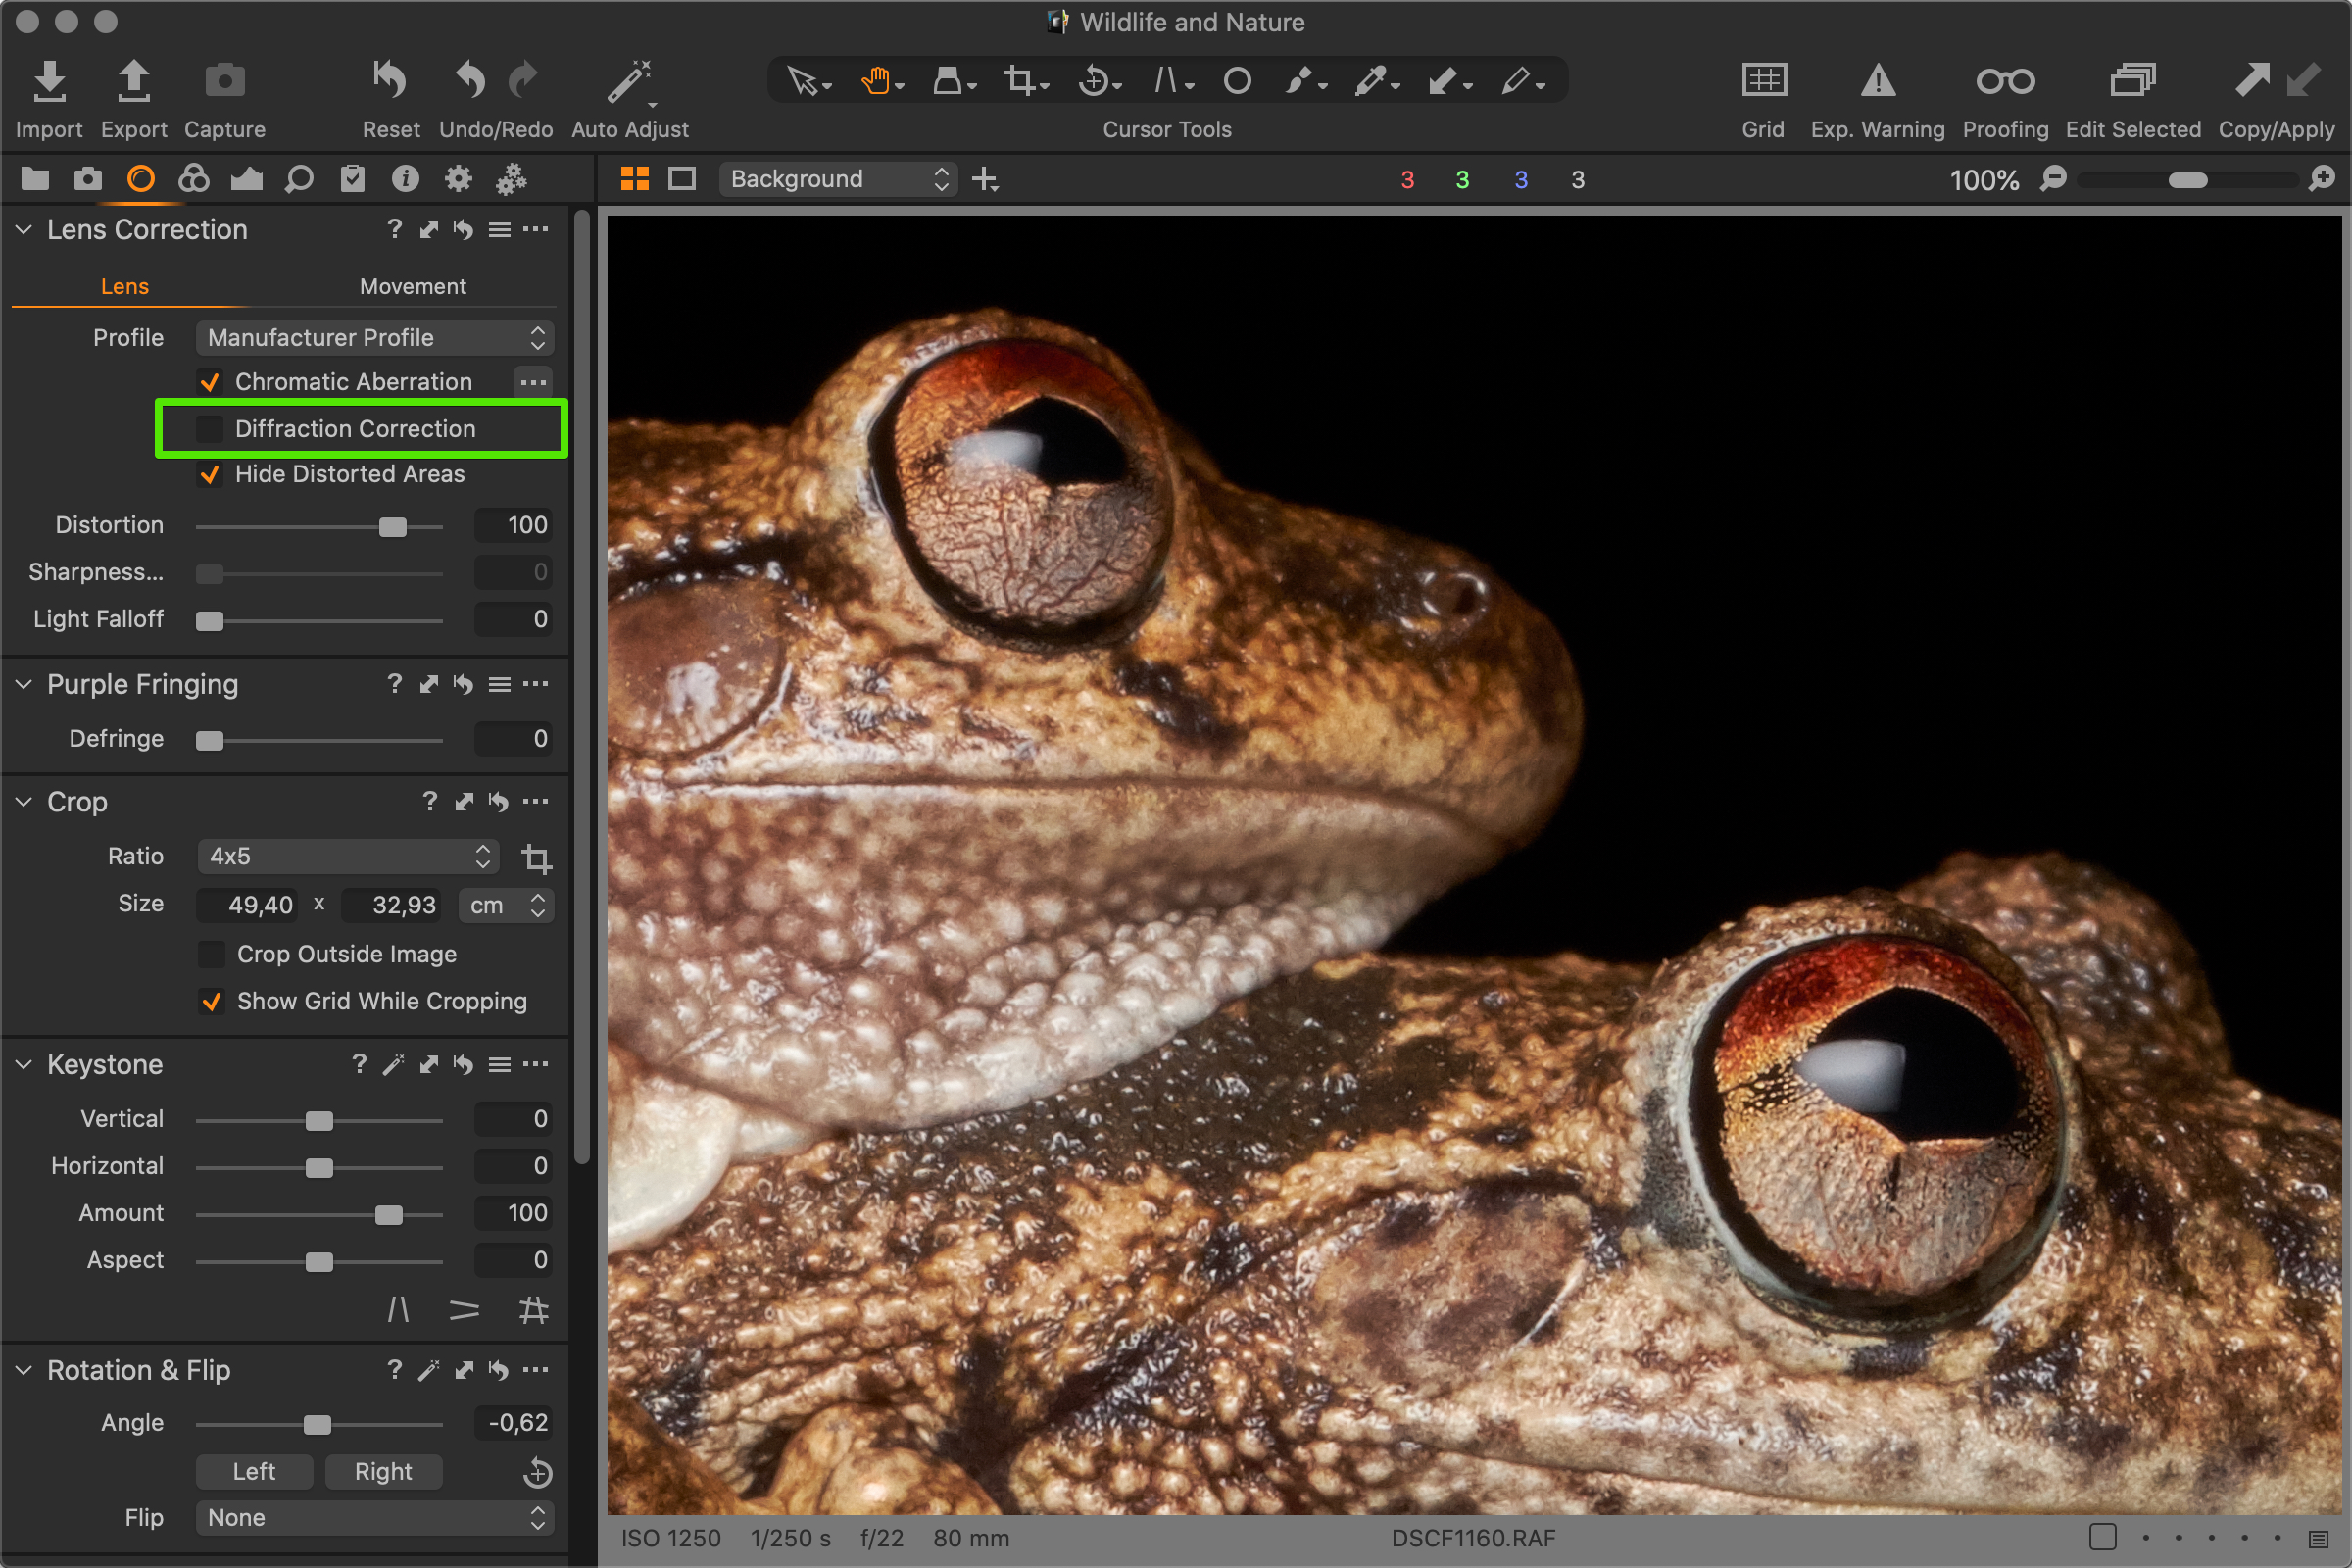
Yes, it is that simple – no sliders, just one click, and you instantly get a sharper image, as you can see on following 100% crop from the photo of Australian Northern Laughing Frogs taken with the APS-C camera Fujifilm X-T2 and Fujinon XF80mmF2.8 lens. It is a mating pair and because the smaller male’s eye was a bit farther than the female’s one, I needed to use extreme f/22 to get both individuals into the depth of field:
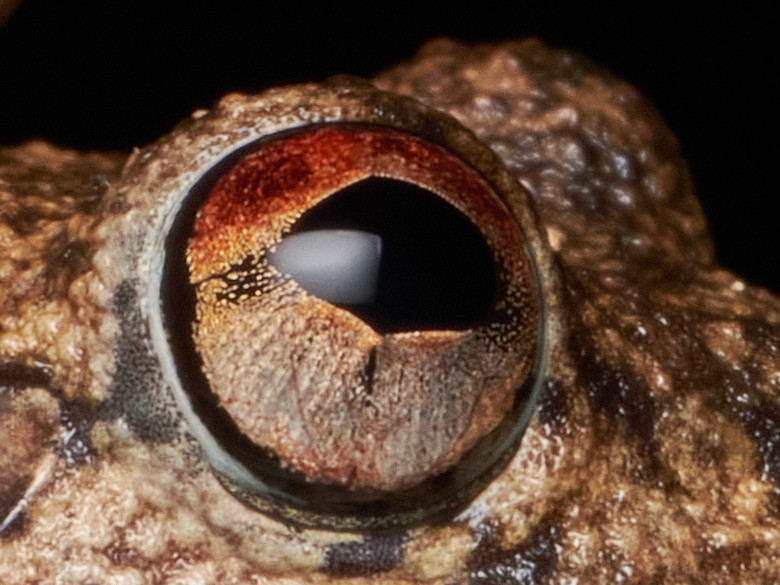
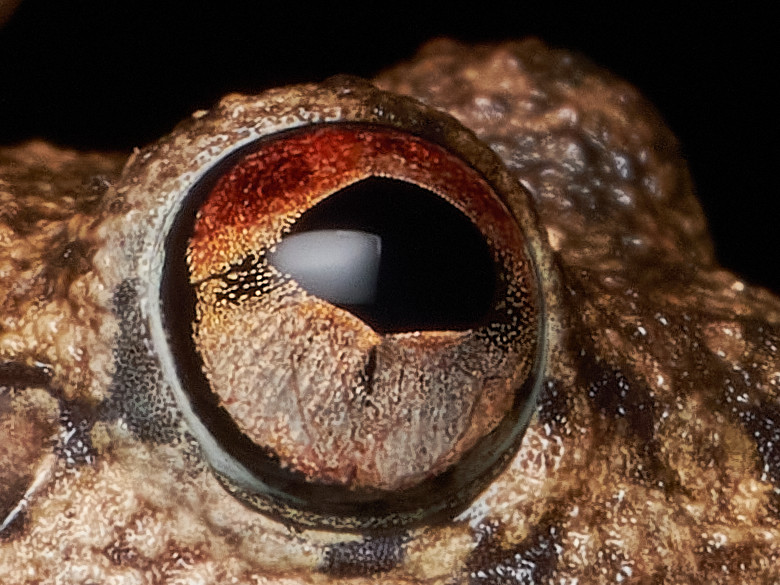
As you can see, the difference is evident and correction improved sharpness a lot. But why is this helpful function disabled by default? Official explanation says that it is very CPU intensive so it makes editing and exporting noticeable slower. That is why you should enable it only when it is really needed.
You should know that the diffraction correction feature of Capture One is a software algorithm, which mitigates the impact of the physical phenomenon, which happens during capturing the image. It cannot fully eliminate the impact of diffraction, but it is still a very helpful tool, which provides solid results without the need to fine-tune several sliders. Additionally, the Sharpening tool remains available for standard overall sharpening even after using the correction. For images captured at a low aperture number, its effect is negligible to none.

Do you want to master Capture One?
You can buy my e-book Capture One Effectively which is a complete guide to this professional photo management and editing application. The well-organized content helps you master the entire process, from importing photos to editing, organizing, and managing metadata, and finally printing or exporting. There are also tips for those switching from other tools like Adobe Lightroom, or a description of my workflows that I’ve honed over years of actually using Capture One to process my own photos. It is available in formats suitable for e-book readers as well as in a more than 400-page-long PDF!
Get Capture One with a 20% discount
The fastest of you will get a 20% discount if you purchase using the button below! The discount applies to the first payment of a license or annual subscription and is for new customers only. I will get the same discount on my next payment.
Get Capture One at 20% off