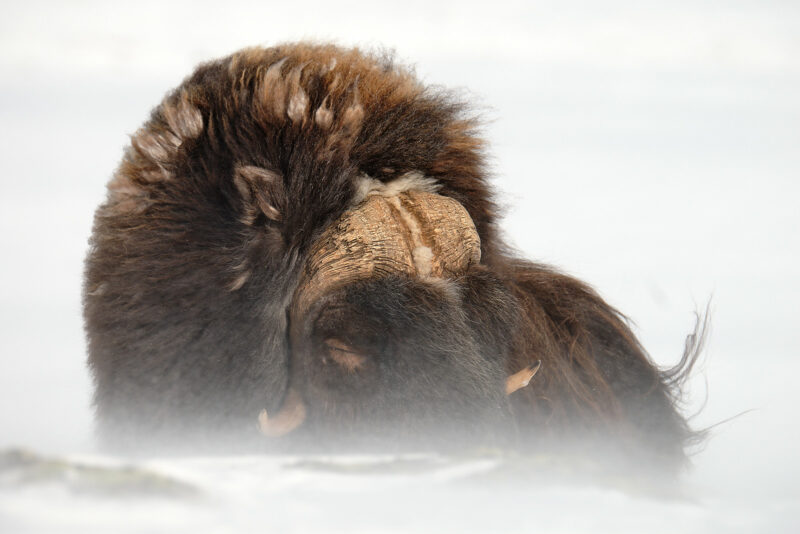
When I was preparing an exhibition a few years ago, I noticed a spot caused by dust on the sensor after I made a 90×60 cm print. It was barely visible on the screen, but much more prominent in the big size. Since then, I check my photos carefully before printing, and today I’ll show you how to use the check layer in the Capture One to do so.
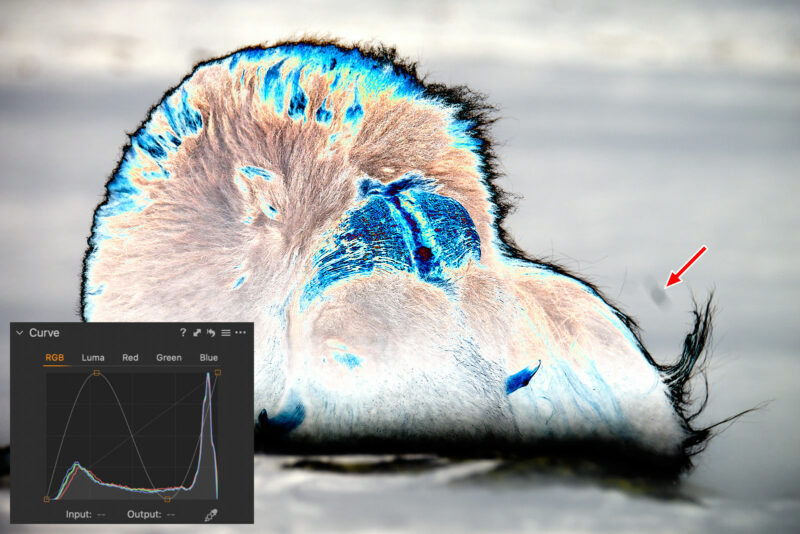
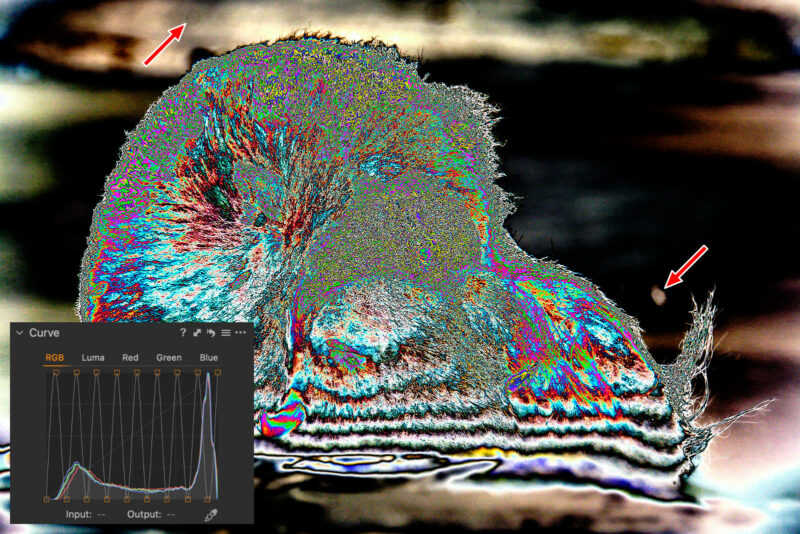
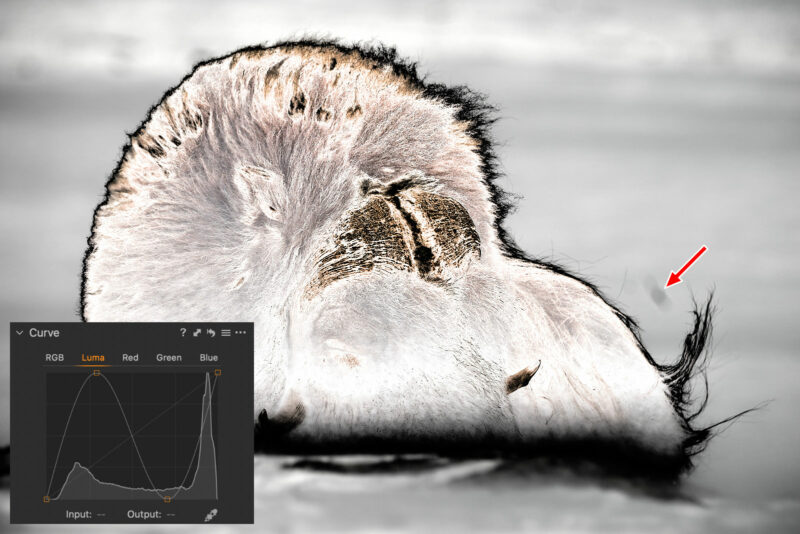
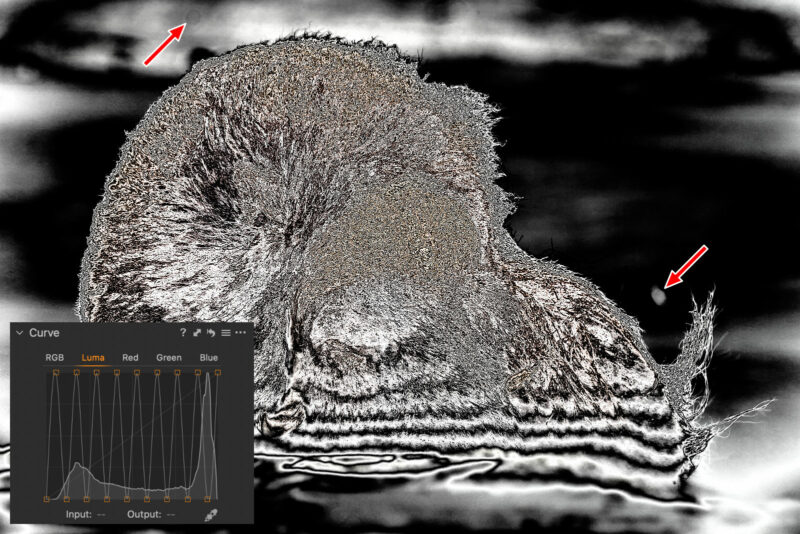
If you switched from Lightroom, you may miss the Visualize Spots feature, which can highlights even the less prominent spots, which may hurt your prints. There is no such function in Capture One, but you can easily simulate it with Curve tool using these weird settings:
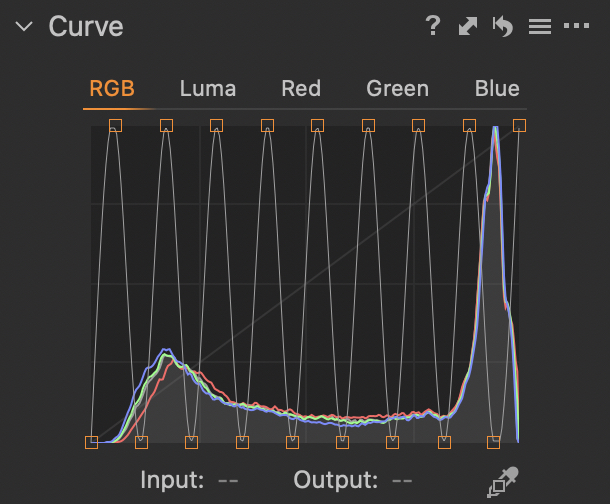
Effect of this curve is a bit different from Lightroom’s Visualize Spots, but it is perfectly usable for detecting spots. Since it takes some time to create an optimal curve, it is definitely worth using the preset that I have prepared for you. Actually, there are four presets – the first pair utilizes the RGB curve and highlights spots with contrast and color, while the second one utilizes the Luma curve and makes the spots visible by altering contrast only (the second option is available only in Capture One Pro). For both modes, two different intensities of the effect are available, which is similar to use of the slider available in Lightroom.
As you can see, both RGB and Luma curves performs similarly and you can choose one by your personal preference. Picking right intensity is a bit more difficult. I recommend you to try both – it doesn’t take much time and the samples above demonstrates that each curve can reveal different spots.
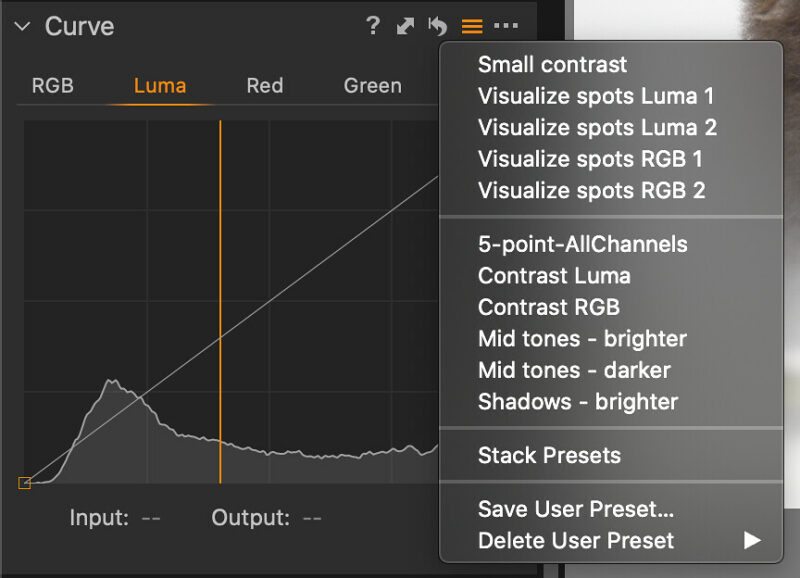
It is easy to install these presets. In Capture One, use option Adjustments → Styles → Import Styles… from the main menu, find and select downloaded files and confirm the selection by Open button. You can verify successful installation by clicking on the icon with three horizontal lines located in the Curve tool heading – presets should appear in the context menu which then opens:
If you haven’t used curves to edit your photo, you can apply the preset directly in the Background layer (unfortunately, this is the only option if you are Capture One Express user), but it’s much more convenient to use a layer for that. Just go to the Styles and Presets tool, find the preset here, right-click on it and select Apply to New Layer from the context menu:
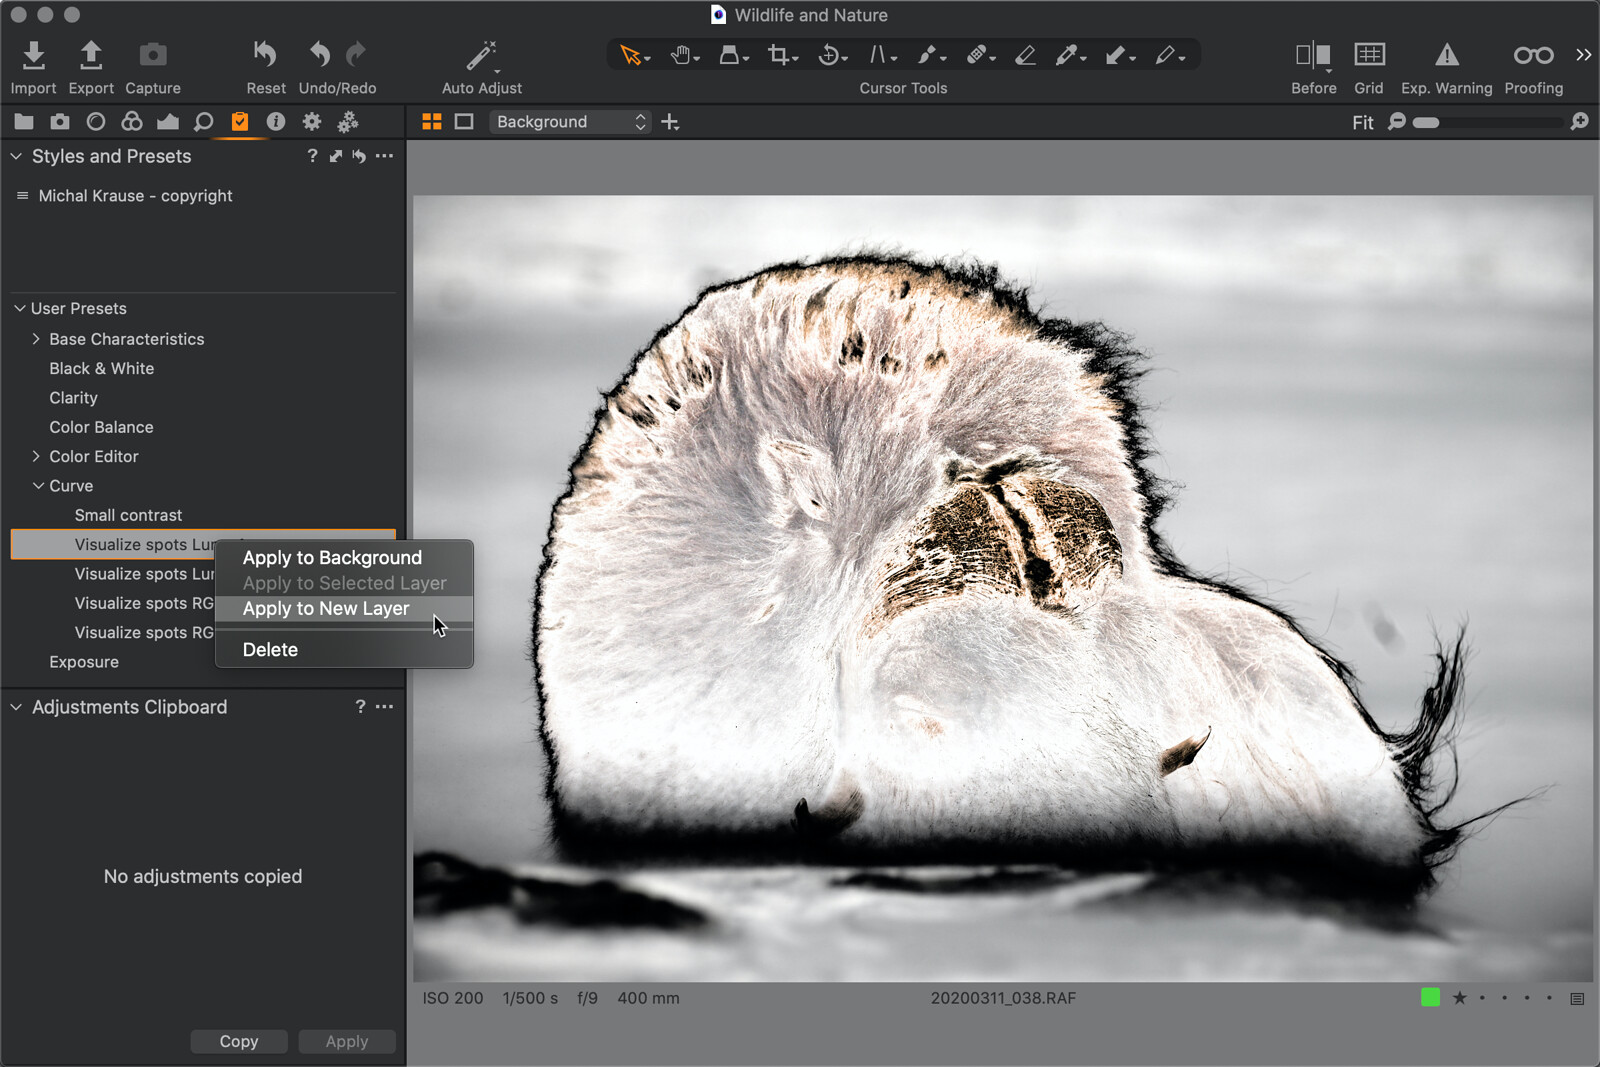
This way, Capture One creates a new adjustment layer with effect applied:
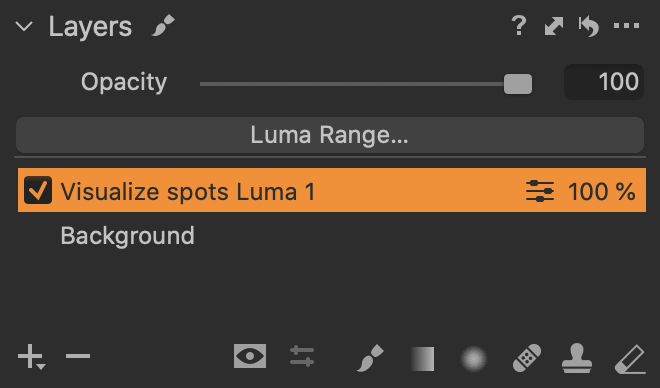
The main advantage of this approach is that your curve on Global layer stays untouched, but there is another benefit: you can toggle on and off spot detection layer as needed during retouching. Such a helper layer whose purpose is to visualize areas for editing and retouching is often called check layer.
If you don’t mind temporarily altering you curve settings, you may open presets menu in the Curve tool mentioned above and hover with mouse cursor above each preset without clicking it – it will preview its effect on the photo so you can localize spots, but when you move the cursor out of the menu, it disappears. This is a very fast method for quick testing without altering the photo.
Do you want to master Capture One?
You can buy my e-book Capture One Effectively which is a complete guide to this professional photo management and editing application. The well-organized content helps you master the entire process, from importing photos to editing, organizing, and managing metadata, and finally printing or exporting. There are also tips for those switching from other tools like Adobe Lightroom, or a description of my workflows that I’ve honed over years of actually using Capture One to process my own photos. It is available in formats suitable for e-book readers as well as in a more than 400-page-long PDF!
Get Capture One with a 20% discount
The fastest of you will get a 20% discount if you purchase using the button below! The discount applies to the first payment of a license or annual subscription and is for new customers only. I will get the same discount on my next payment.
Get Capture One at 20% off