Since the addition of the extremely useful AI masks at the end of last year, there have been a few other Capture One updates that probably haven’t taken anyone’s breath away, but it makes sense to look at them in a six-month summary.
Tethering: shoot to memory card and computer at the same time, and improvements for Sony or Fujifilm
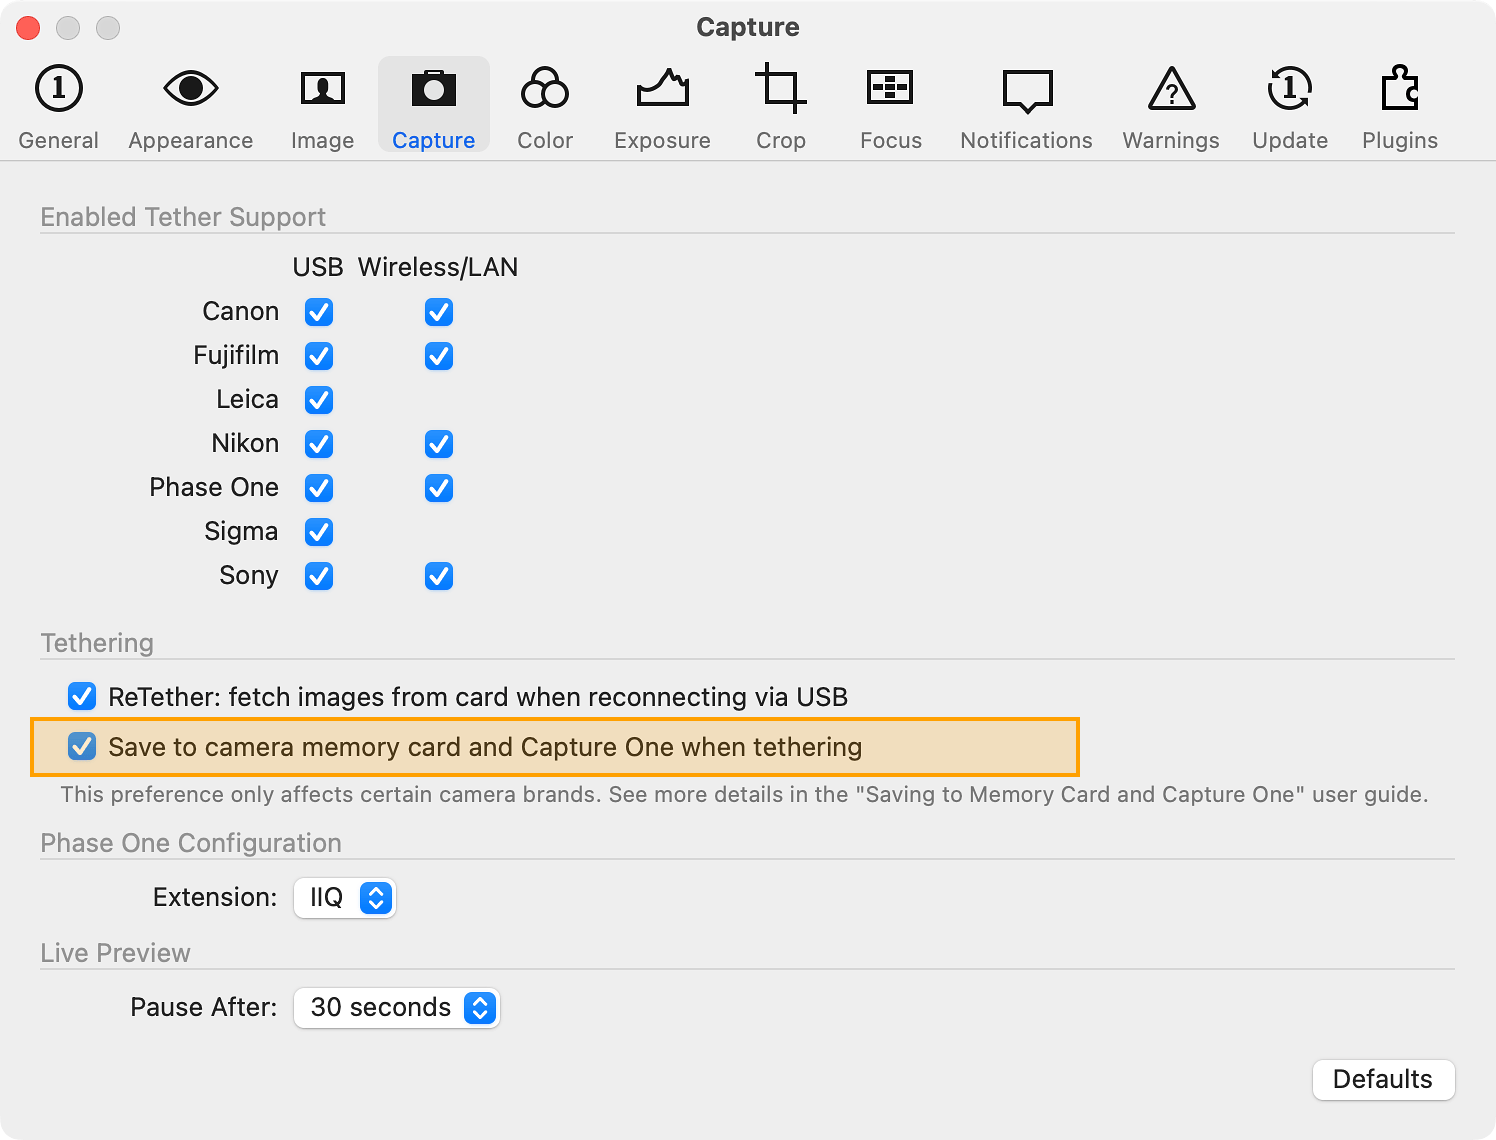
When it comes to shooting directly to your computer via USB or Wi-Fi, Capture One is one of the absolute best. The already existing options are improved a bit by a new option in the settings that allows you to automatically determine whether the camera should save photos only to the computer or also to the memory card, without having to think about it. It’s a little thing that makes life easier, but unfortunately only for Canon and Nikon users — it has no effect on other brands (although you may find a similar option for them in the Camera Settings tool on the Tether tab).
Users of the Fujifilm X fifth generation cameras (X-H2S, X-H2, X-T5) and the GFX 100 II and GFX 100S II will enjoy nicer and smoother live view as well as dual control — the ability to change settings from both the app and the camera when connected to Capture One.
For Sony shooters, the ability to zoom and pan the live view has been added for more detailed focus assessment — while this only applies to cameras released from 2020 to the present, it’s still a nice improvement.
Capture One Studio
Update number 16.4 introduced a new version of Capture One called Studio. This is aimed at professional use of Capture One in high-end photo studios and offers some additional features. In addition to Capture One Pro, there are also Legacy and Enterprise versions, both of which are usually unknown to regular users. The Studio is probably an attempt to change this situation and expand the product offering with a version designed for use in large studios. It takes some features from the Enterprise version, adds others, and fully integrates the cloud-based Capture One Live service. Conversely, the introduction of the new version has not resulted in any restrictions on the Pro version, which is used by the vast majority of users. Studio is only available as a subscription for individual users, teams or in the aforementioned Enterprise version. It remains to be seen whether this move will make the range of Capture One versions clearer or more confusing, but at this point it’s safe to say that most users can probably ignore the existence of the Studio version.
Editing: smarter cropping, Fujifilm Real Ace simulation or better batch editing and styles
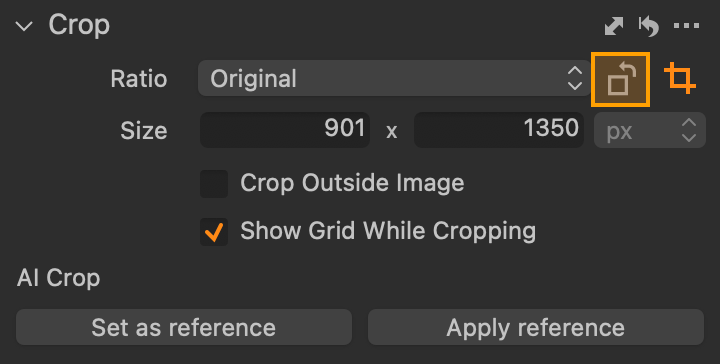
Back to Capture One Pro. Recent updates have improved the Crop tool. The little thing I’ve personally missed in the almost 10 years I’ve been using Capture One is the ability to easily change the orientation of a crop. Previously, to switch between landscape and portrait, you had to drag one of the corners of the crop, which of course changed the crop area significantly. Now you can also use either the button in the Crop tool or the new Shift+X keyboard shortcut.
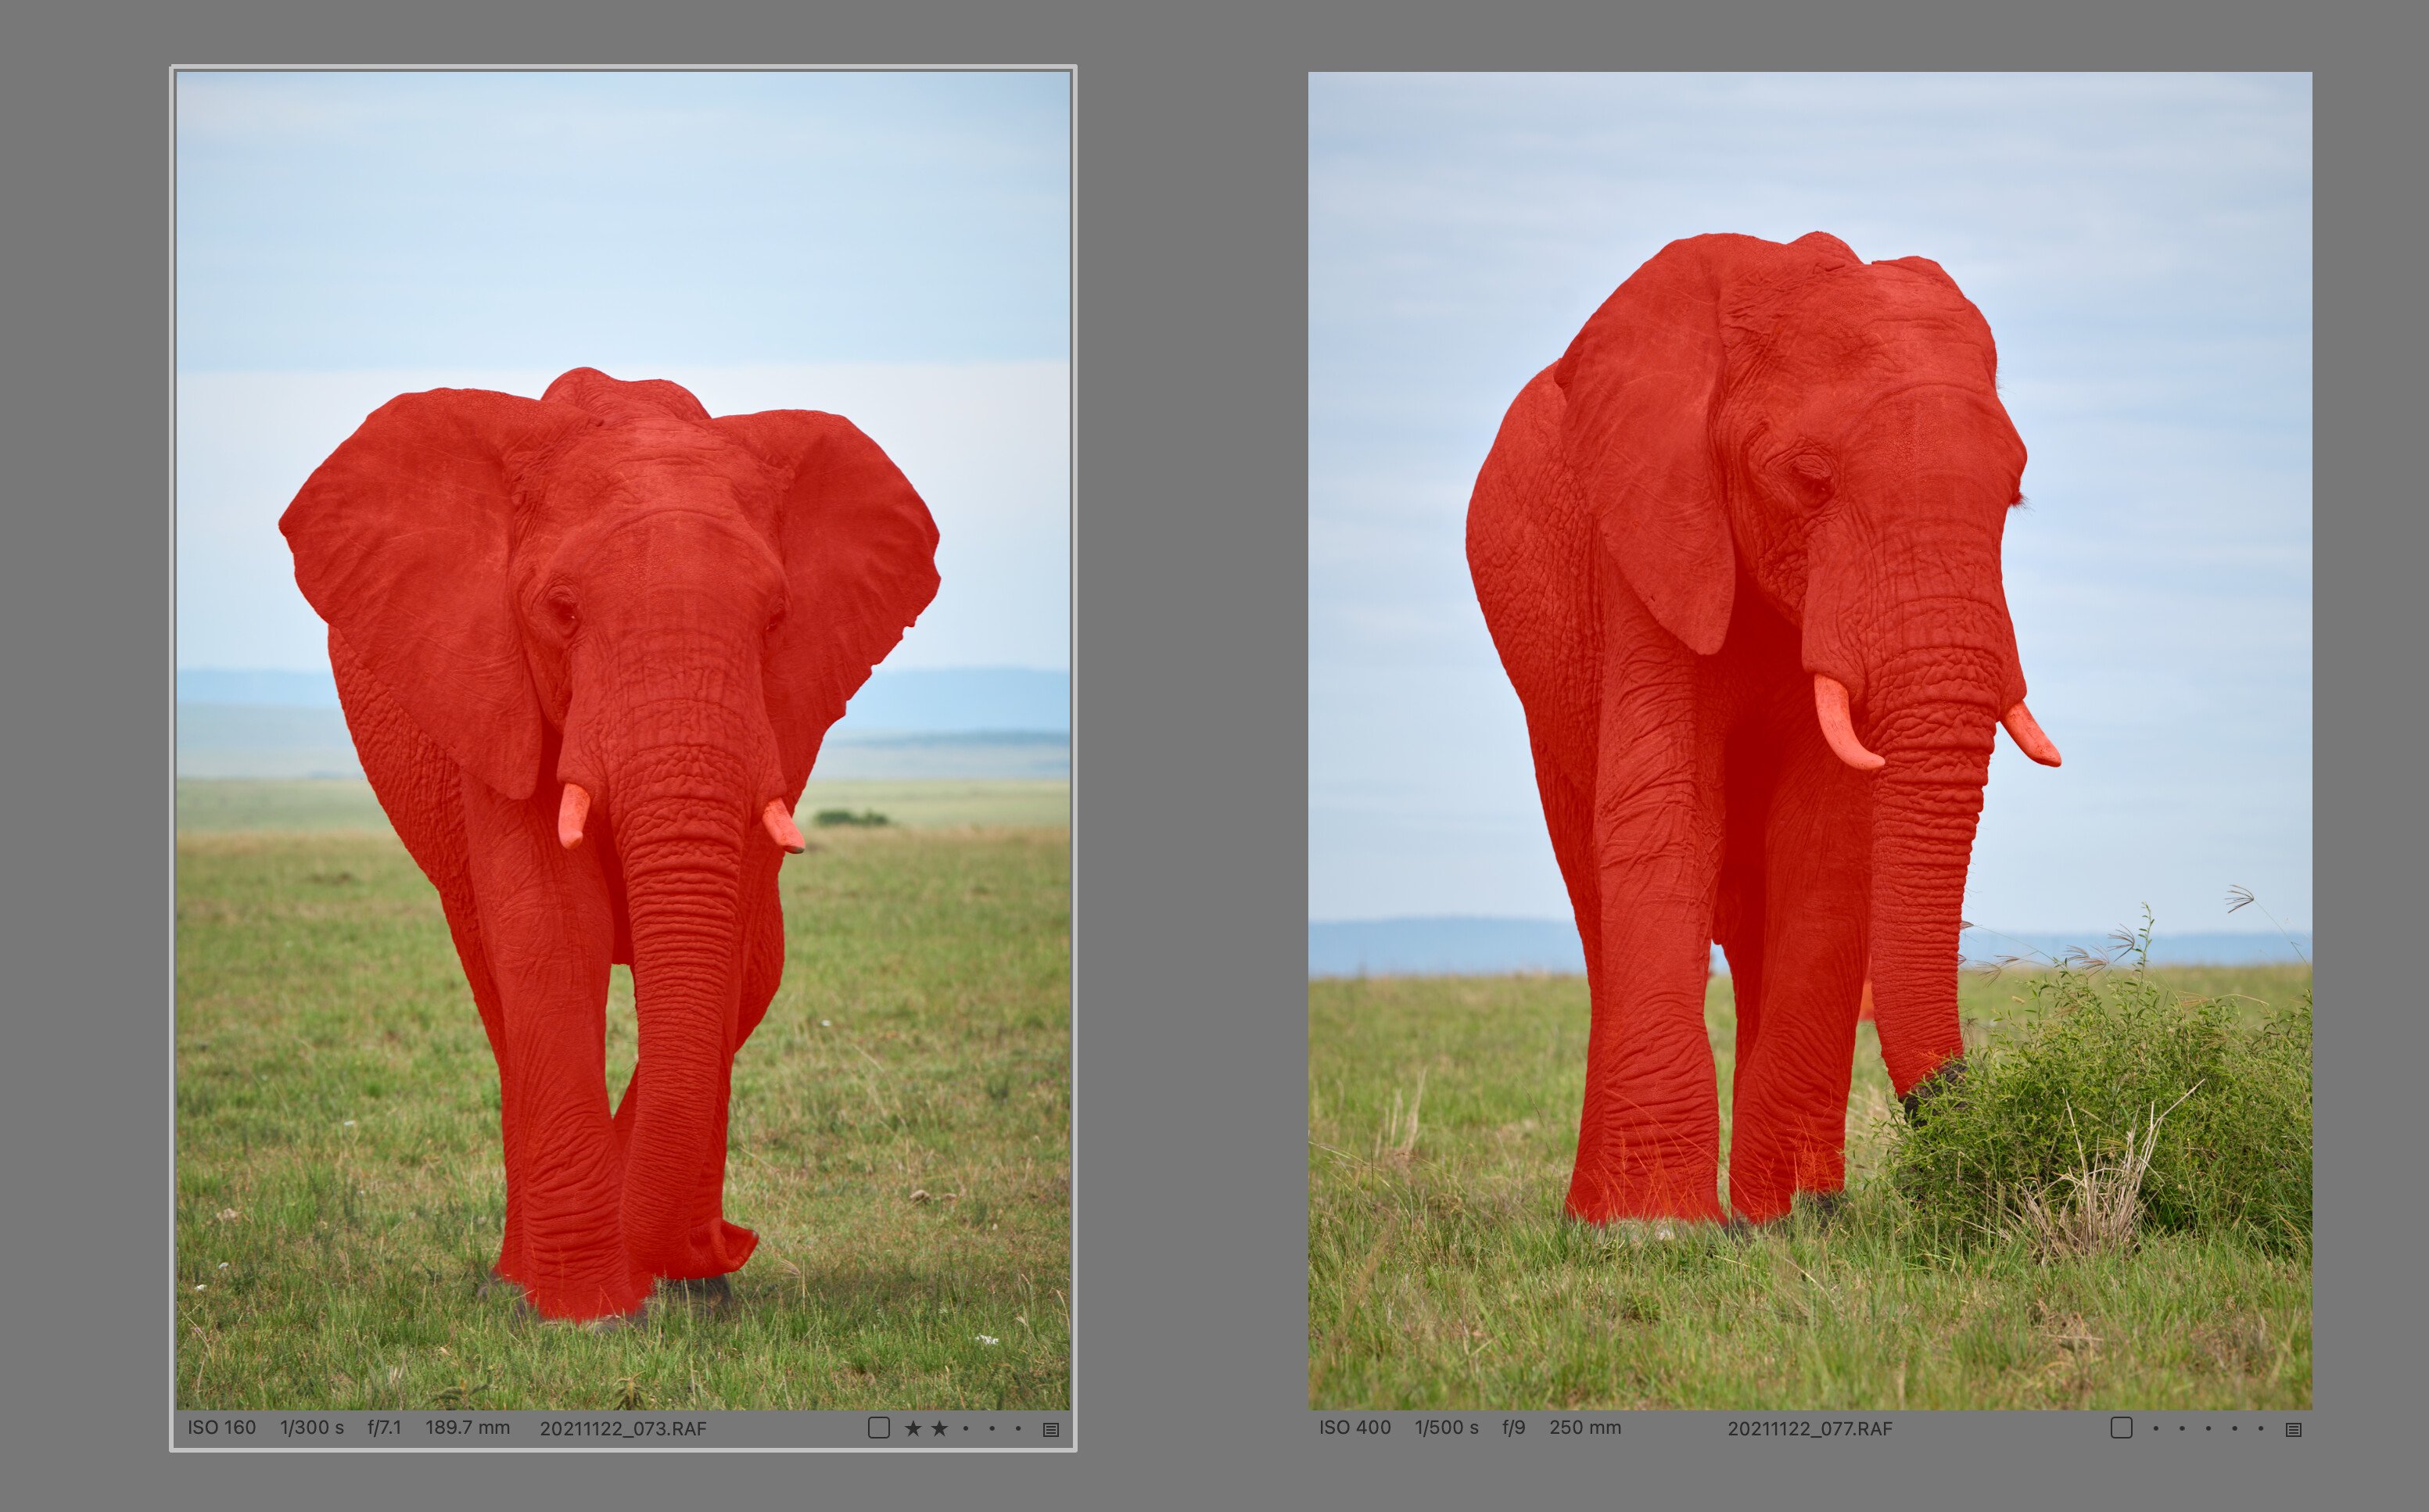
The second new feature is the addition of AI Crop. This is not a magic wizard that will figure out how to crop a photo for you, but rather a batch editing tool. First you have to decide on the crop for a photo and set it as a reference (Set as reference button). Then, in the second step, you simply select several photos to be cropped according to this reference and use the Apply Reference button. Thanks to the AI, it doesn’t just copy the crop, but cleverly adapts it to other photos according to their content, so that the composition resembles the reference.
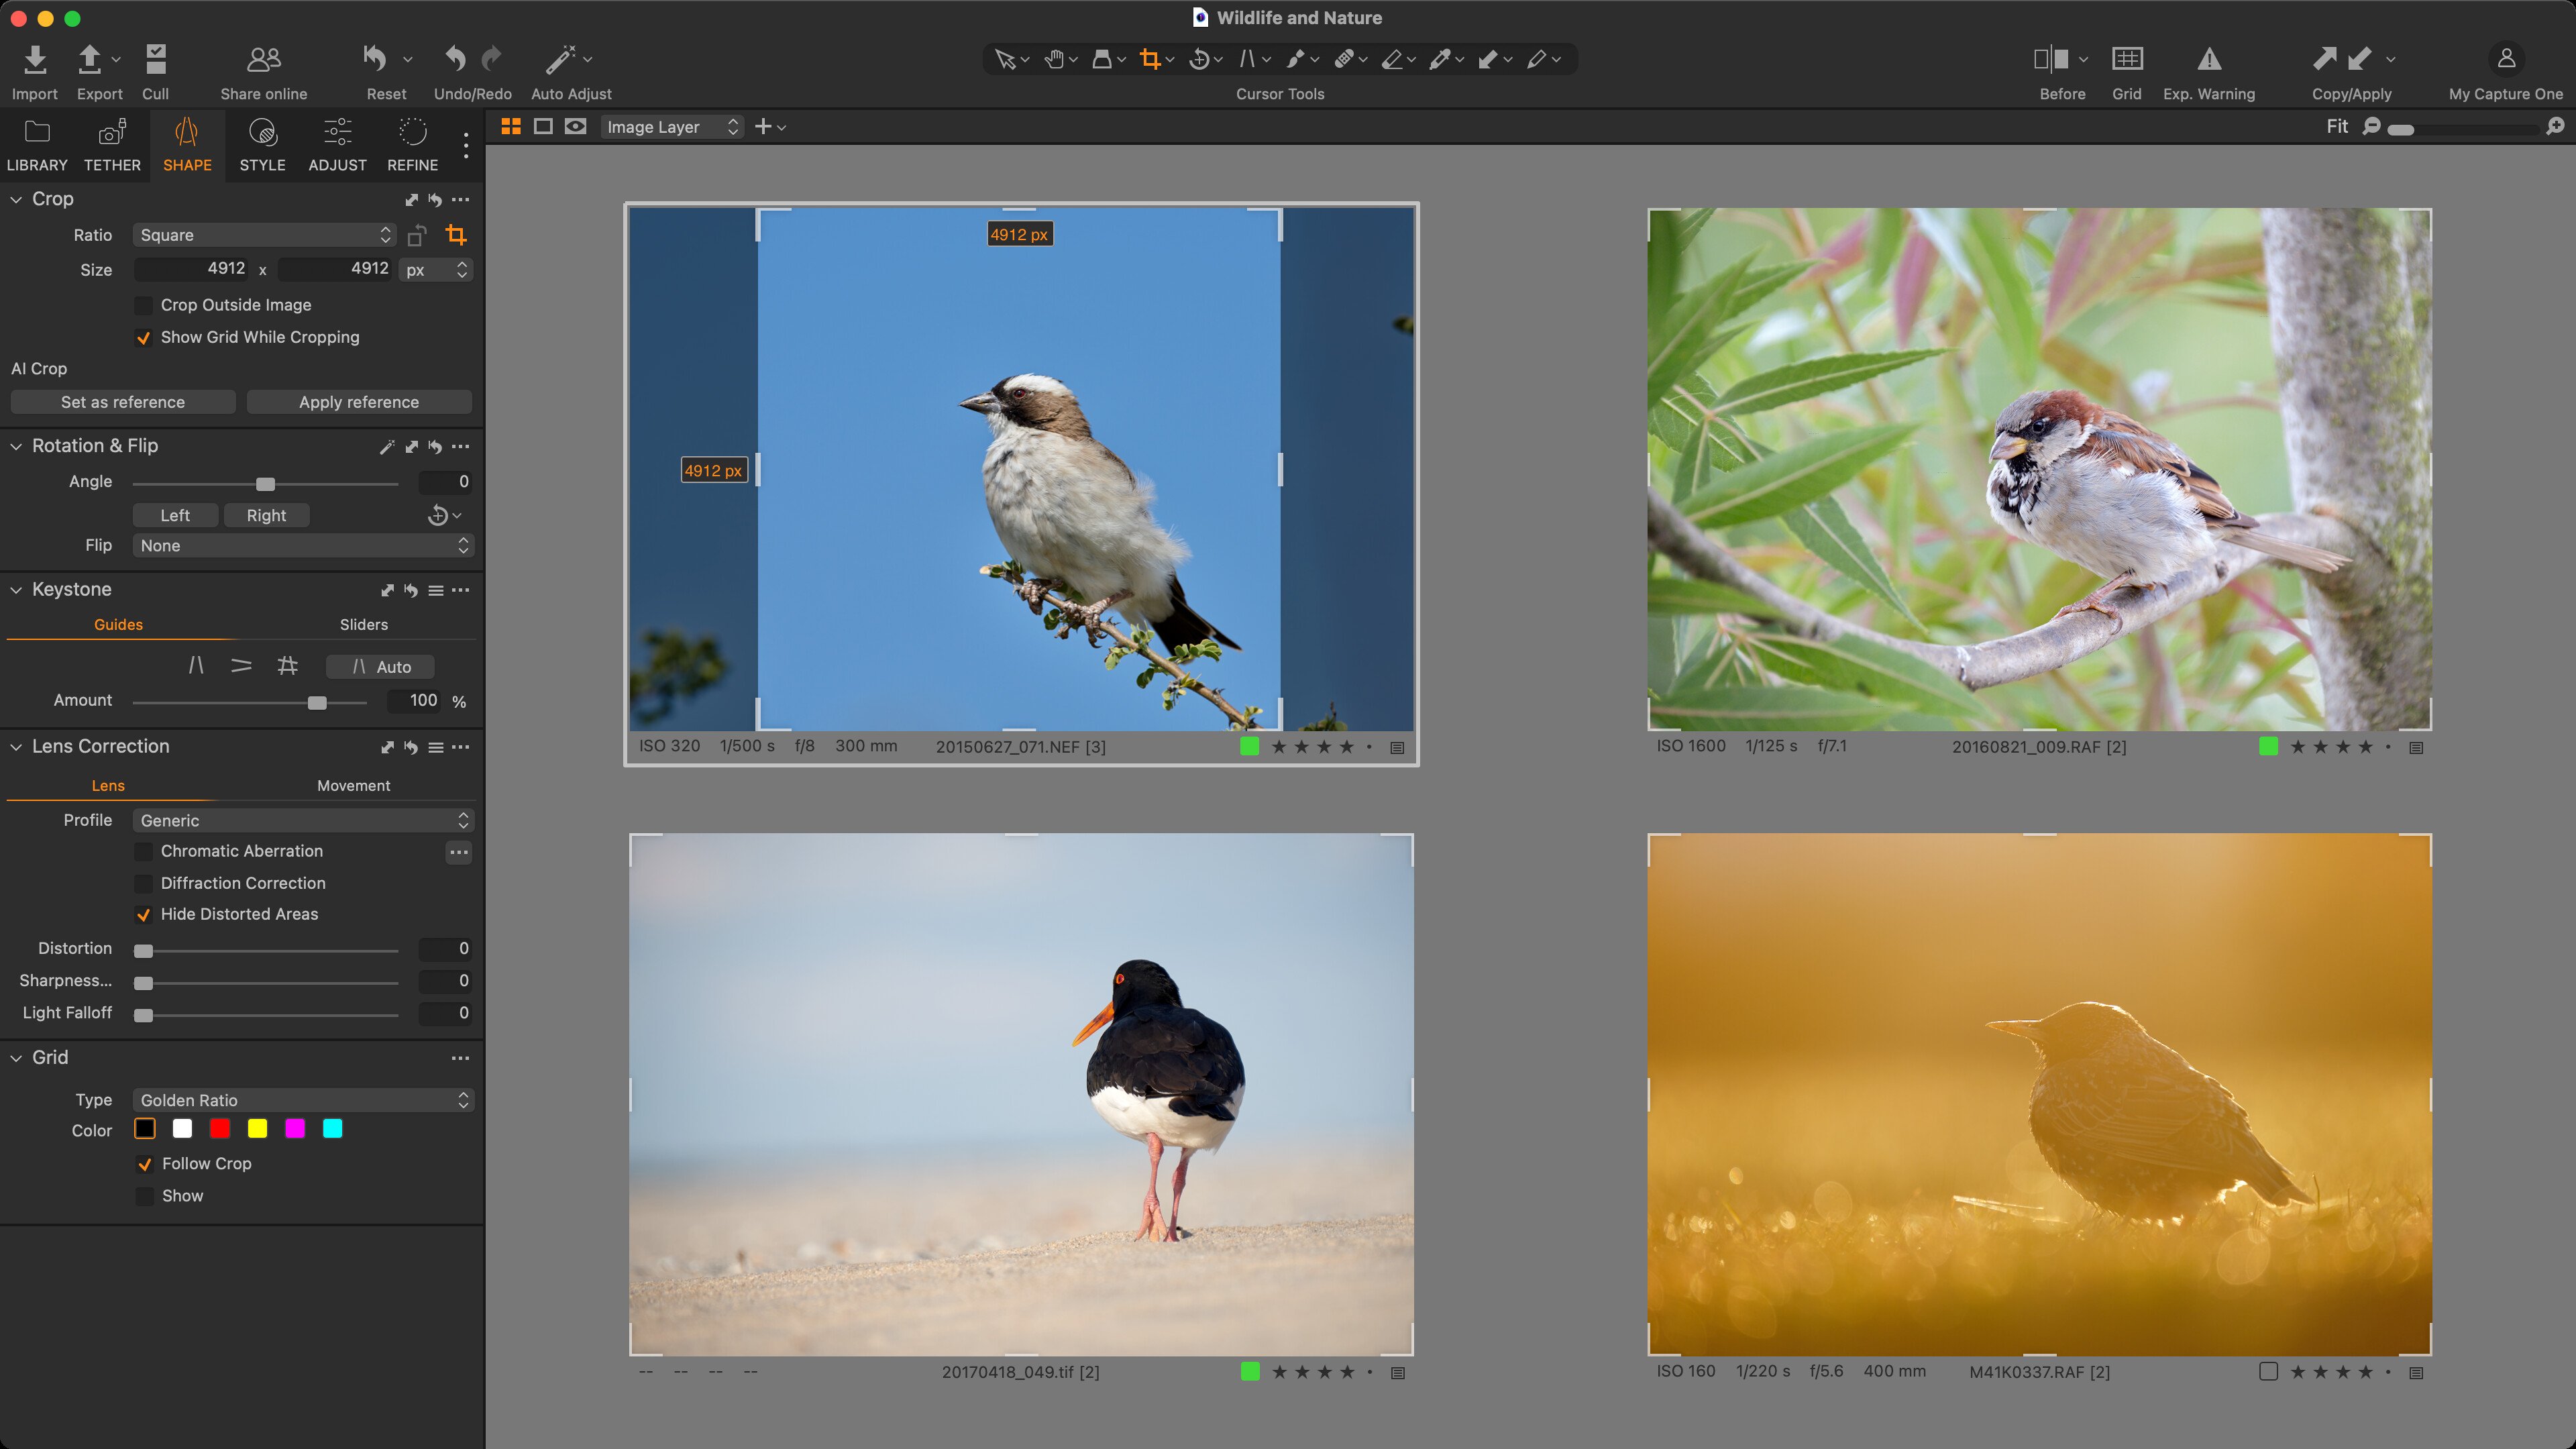
Although AI Crop can be applied to any combination of subjects, it obviously works best with similar photos, and that’s its purpose — for example, to easily unify the composition of a series of portraits that have been “messed up” by the model’s or photographer’s movements. For the sake of completeness, I’ll add that the Studio version has more detailed AI cropping settings that can give priority to people’s faces or set mandatory criteria in terms of the space that must be left for each side of the photo. You might appreciate this in photography, where you know in advance the requirements for adding text to the image, and so on.
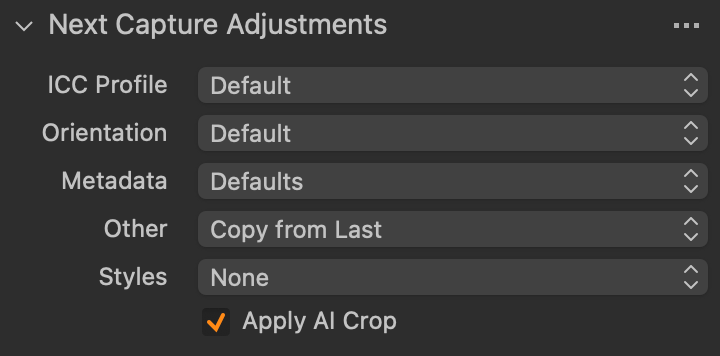
You can also use AI cropping when shooting tethered. The Next Capture Adjustments tool adds an Apply AI Crop option that works very similarly — just crop a photo to your needs, set it as a reference in the Crop tool, and Capture One will automatically and intelligently crop the next image into the same composition.
If you are editing multiple photos in bulk, you’ll also appreciate the enhancements to local adjustments and styles. The AI masks are great, but they can still be improved. In recent versions, they’ve been speeded up for both the Subject/Background functions, which automatically select the main subject or background, and the AI Brush.
The improvement in copying AI layers between photos is also welcome. Once the mask has been created with the Subject or Background button, it will be regenerated according to the content when applied to the next photo. So if you have two photos of similar subjects with different compositions, you can easily transfer the adjustment from one to the other without having to manually edit the mask. This is a great improvement, because originally it was not possible to easily transfer adjustments from the AI Subject or Background layer of one photo to the other.
Styles have also received a new enhancement — layers stored in styles can now be assigned a Luma Range that will be applied correctly to each photo. This opens up new possibilities for creating styles that work better on a wider range of photos.
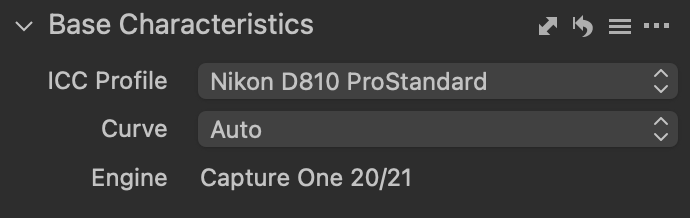
A small but important change is the switch to the ProStandard profile as the default for cameras that support it. This profile has always been described as more advanced than the older Generic profiles. If for some reason you prefer the old one, you need to save it as the default for your camera. Of course, photos edited before this change will retain the original profile.
Other improvements
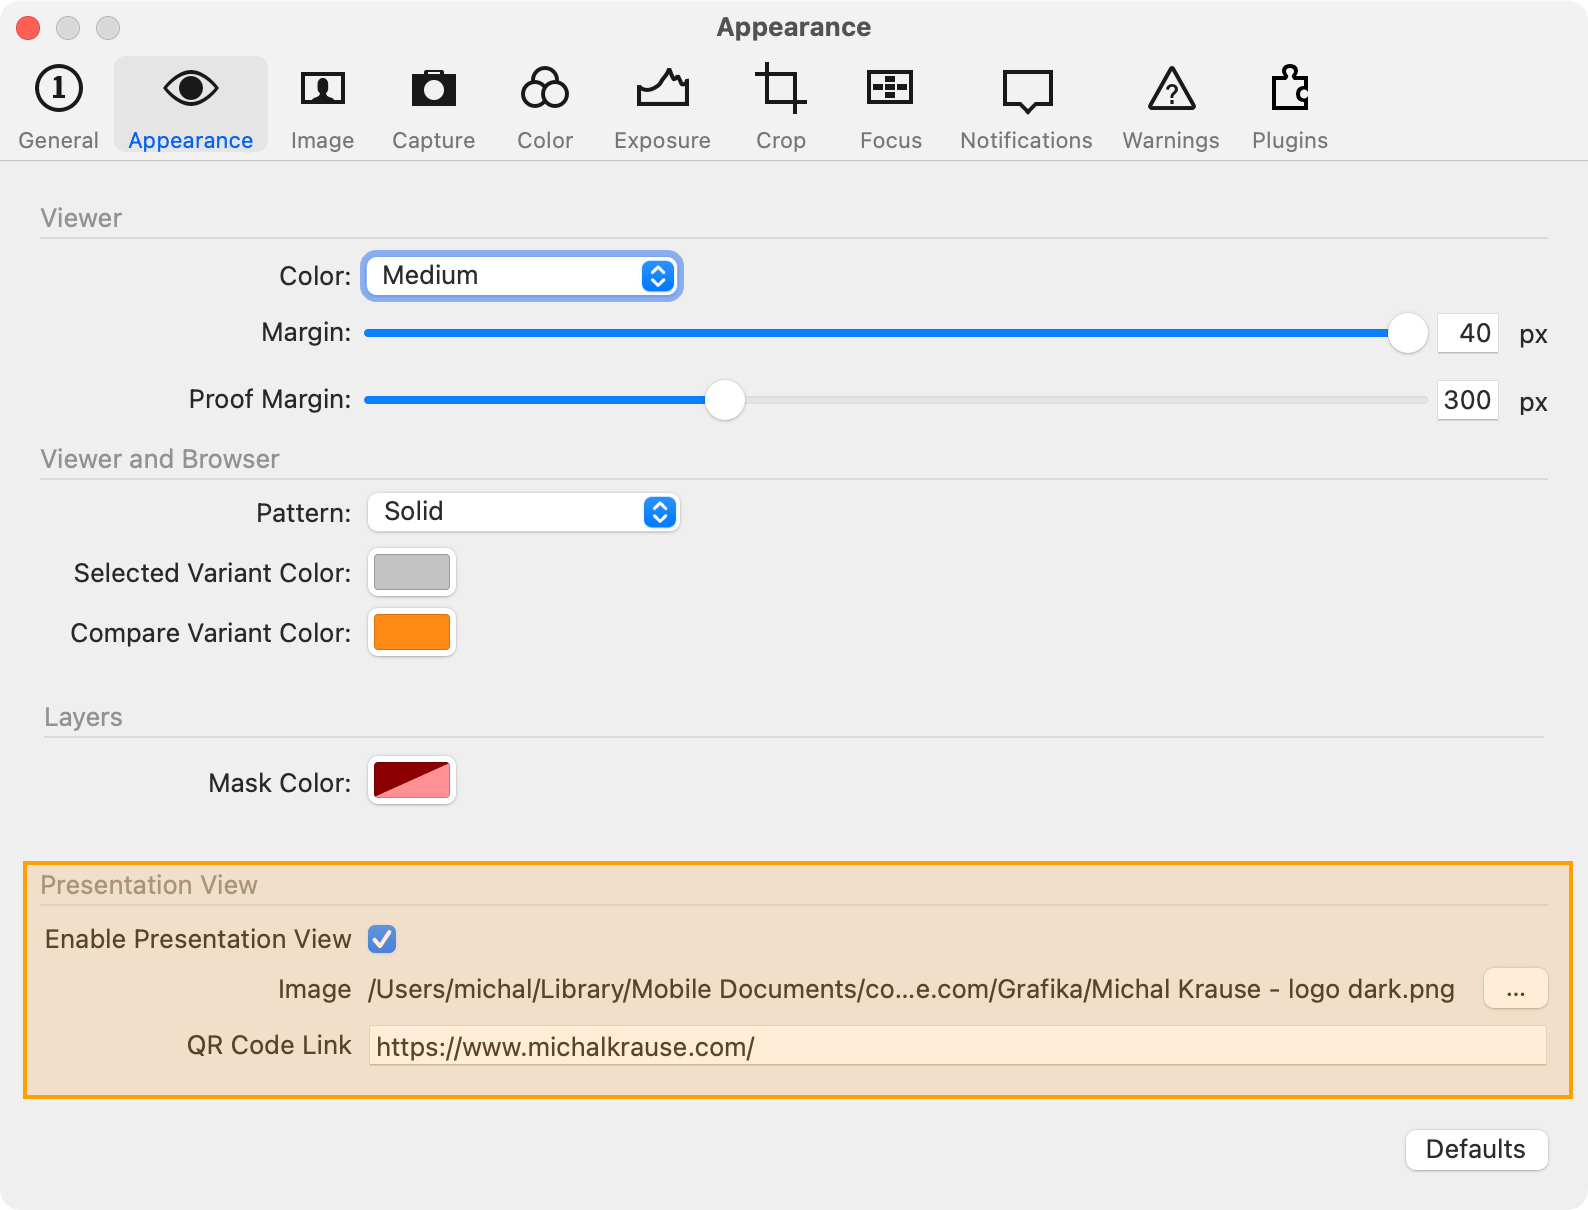
If you are an educator or tutorial creator, you can turn on what’s called Presentation Mode (on Mac only for now), which adds your logo and possibly a QR code with your website address to the main application window:
This mode is only enabled in the application preferences on the Appearance tab, where you can also insert an image with a logo and a website address for the QR code:
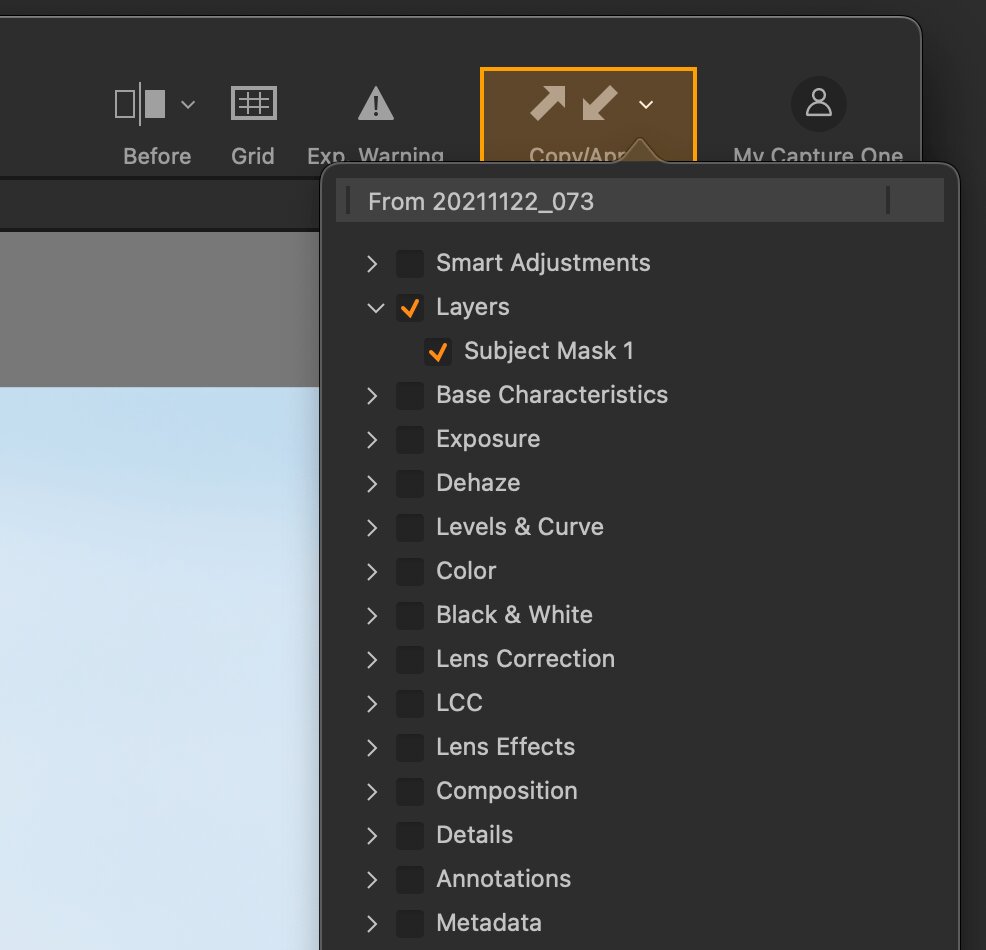
There is a small arrow next to the Copy/Apply double button in the main toolbar that opens the Adjustments Clipboard. There you can check what’s on the clipboard and possibly disable some items. This is a quick access to the same interface offered by the tool of the same name in the Style tab of the sidebar.
Updating Capture One to newer versions is now done directly in the application. When a new version is available, just accept it and it’s done automatically — no need to go to the web, download the new version and install it manually.
As always, some operations have been speeded up, namely
- generating RAW previews takes up to 2.5 times less time, depending on the camera
- the aforementioned creation of AI masks Subject and Background has been made up to 4 times faster
- when using the AI Brush, the Preparing AI Mask phase is up to 18 times faster compared to the first version
- file operations when working in sessions — batch renaming 3 times faster, moving between folders 4 to 8 times faster, deleting files 3 to 10 times faster, moving photos to the Selects folder up to 12 times faster
And of course, there’s support for new cameras, including
- Fujifilm X100VI, X-T50 and GFX 100S II
- Sony a7CR, a7C II and a9 III
- for Nikon Zf and Nikon Z8 NEFX, the ability to stack pixel-shift photos (but still requires the Nikon NX app)
- Leica SL3
- OM System OM-1 Mark II
- Nikon Z6 III
- and more
Mobile version
The iPad and iPhone versions of Capture One also include a number of the changes mentioned above, especially in the areas of tethering and support for new cameras, with new features added essentially alongside the desktop version. This time, however, there is also good news for users who are more interested in managing and editing photos, for example on the go. The latest mobile version adds Levels and Curves — after two years, it’s hard to say anything other than: finally!
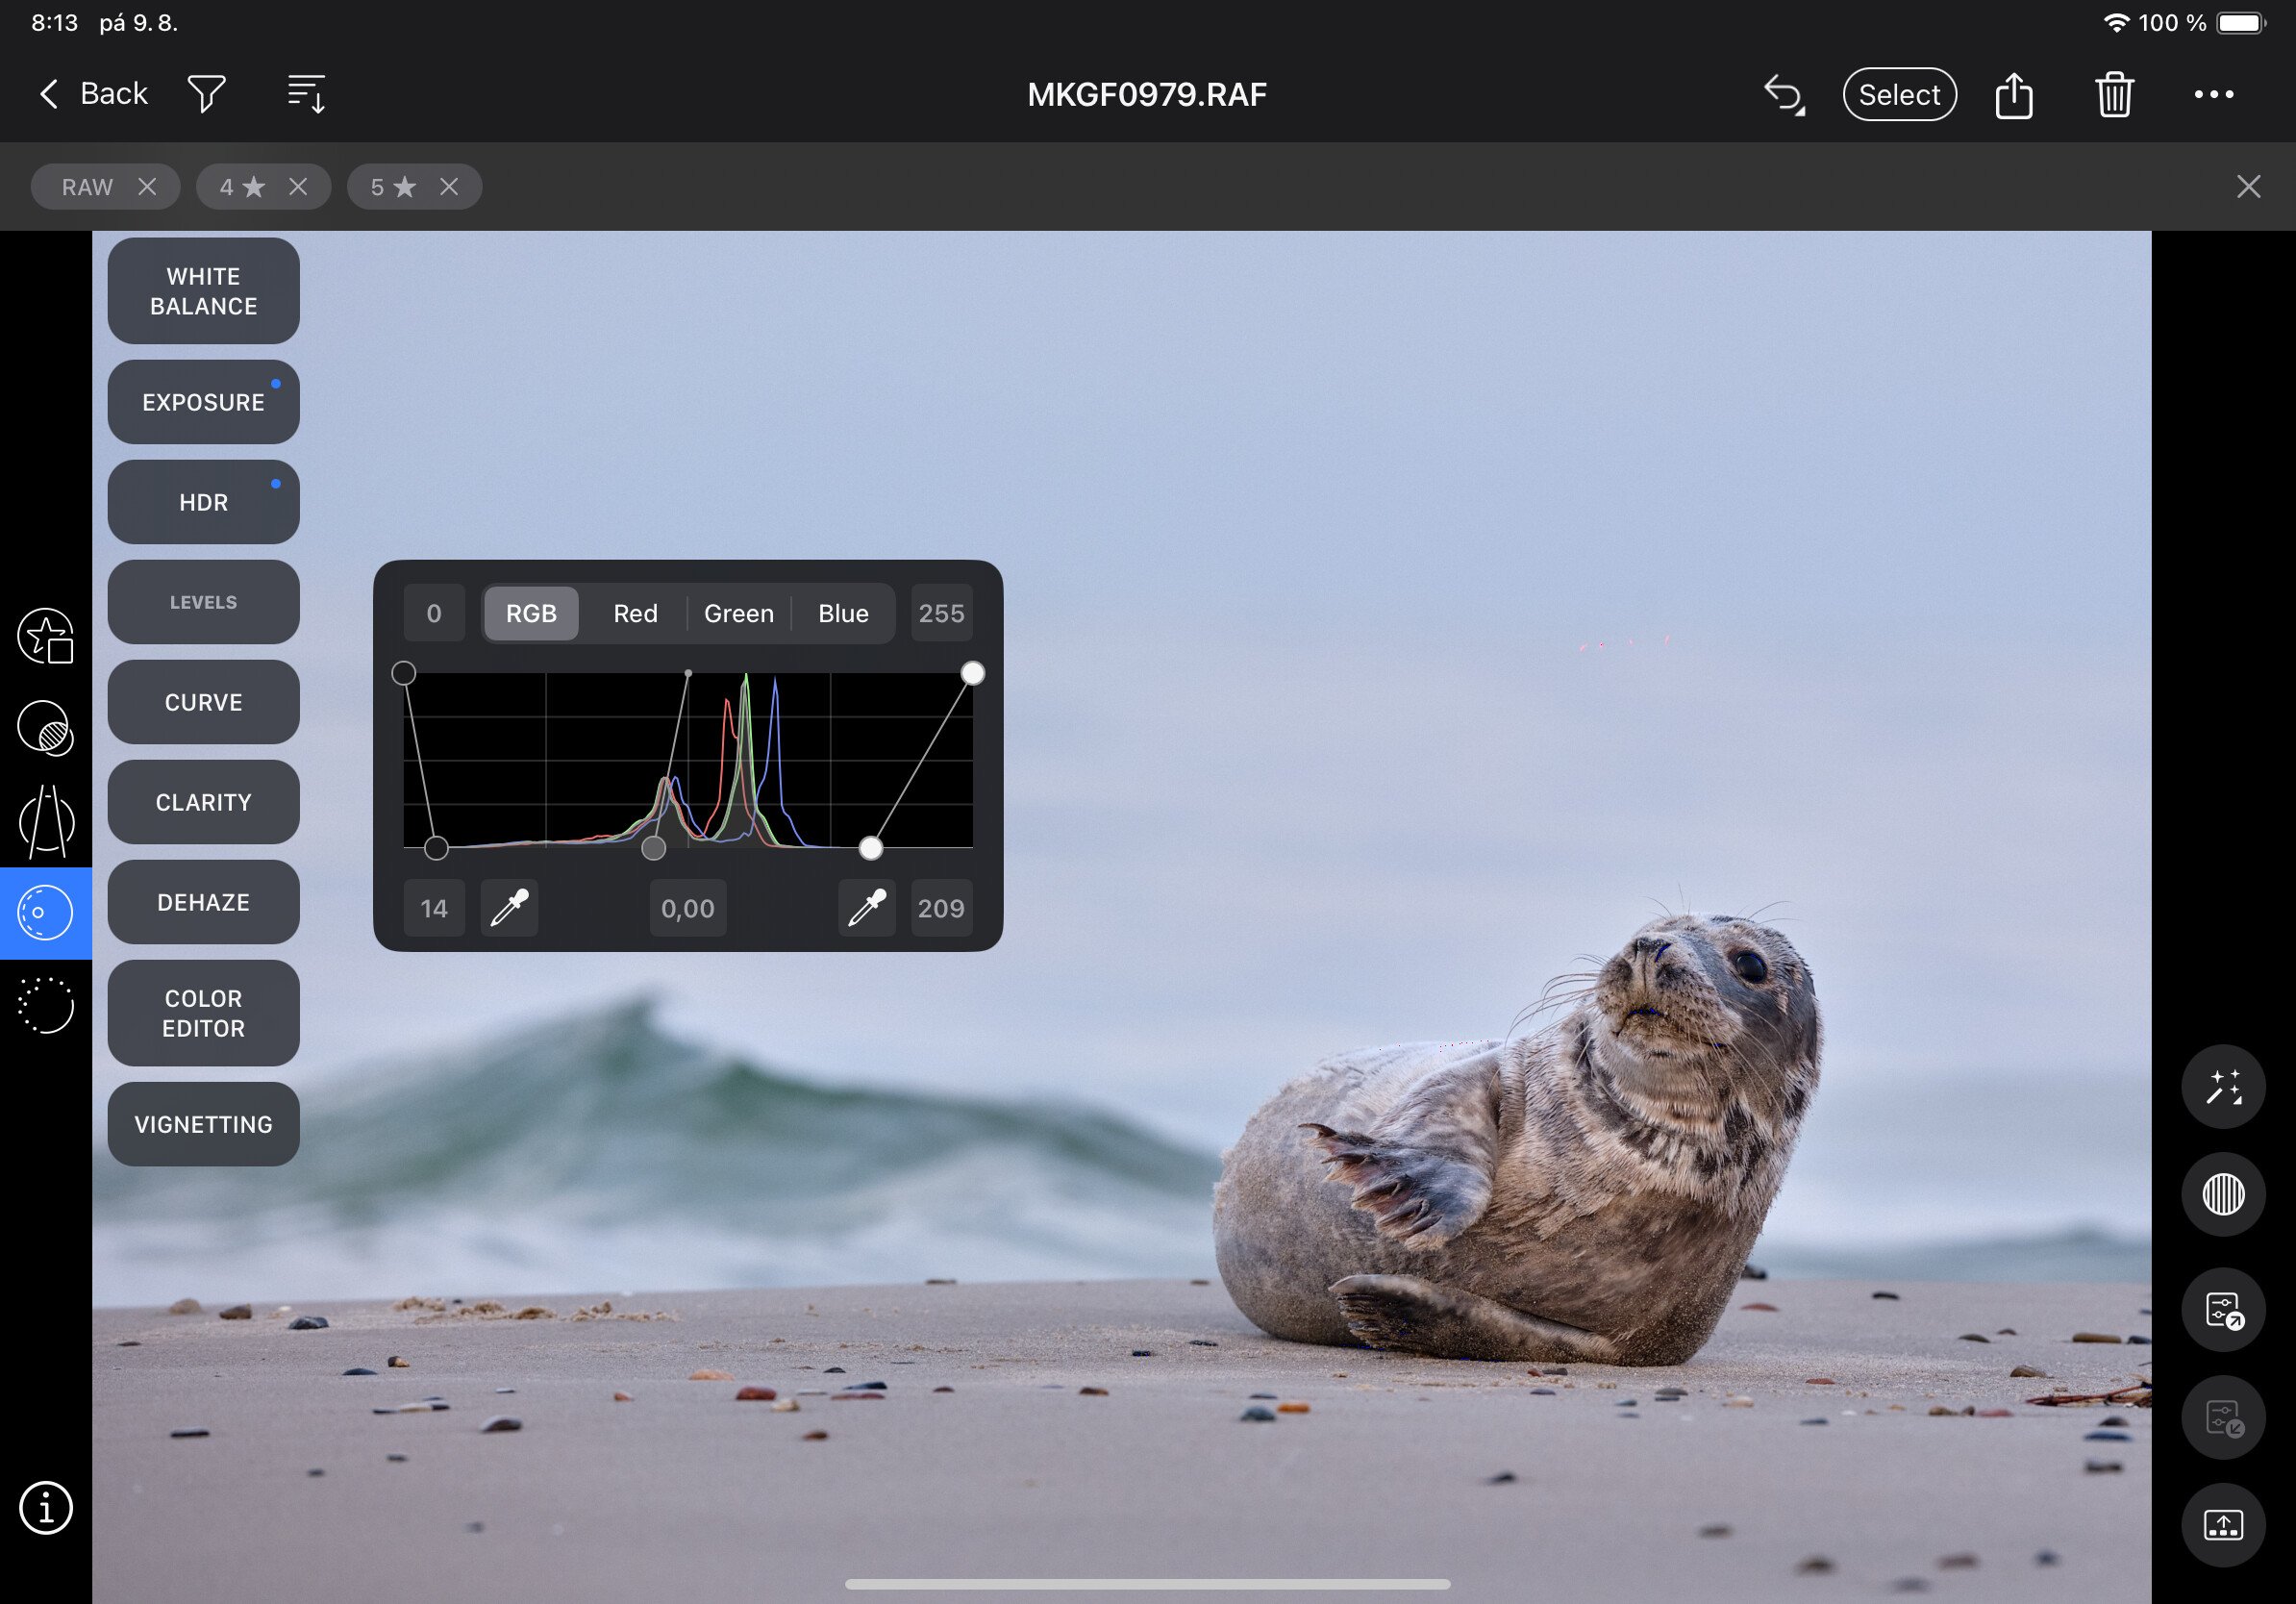
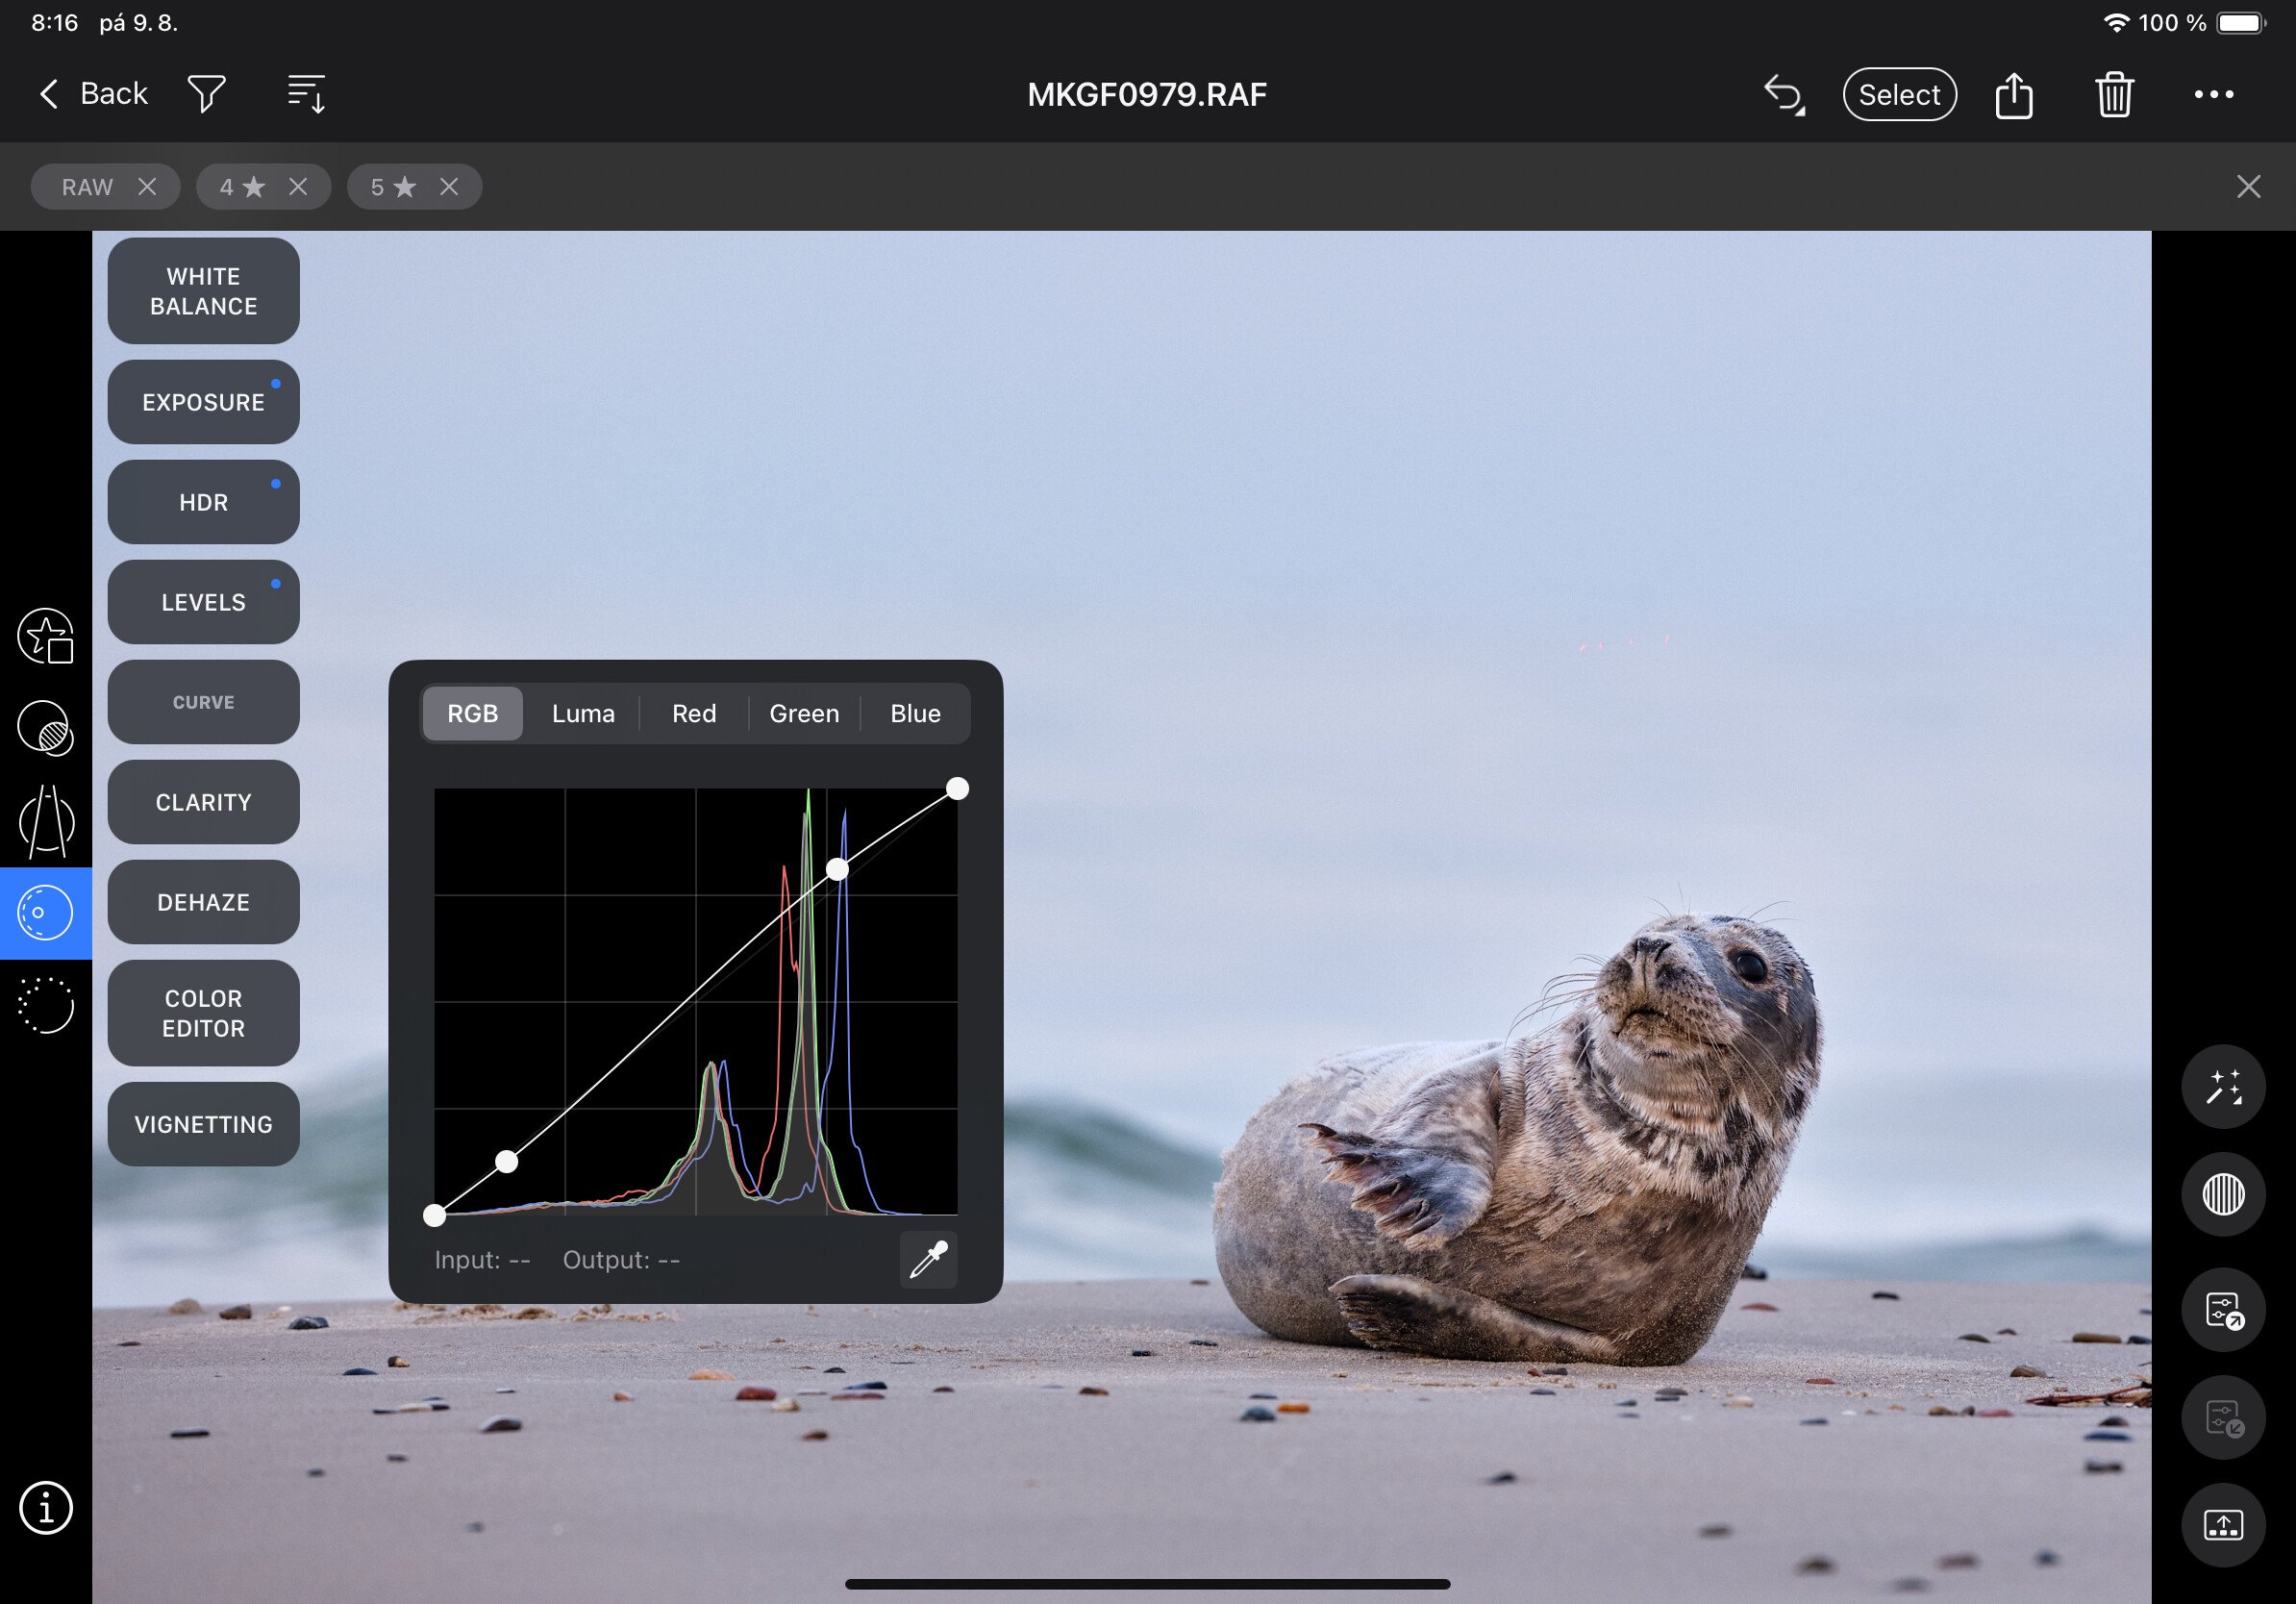
Levels and Curves offer comparable functionality to the desktop version, including the ability to use droppers to select a level or curve point directly from a photo.
So the range of editing tools is almost complete — only Color Balance and perhaps less importantly Purple Fringing, Lens Correction (correction is applied, but you can’t adjust it in any way) and the Color Profile option (this can be replaced to some extent by presets created on your computer) are missing. So the next big thing should definitely be local adjustments, which is why some photographers still keep Lightroom on the iPad.
Also nice is the ability to work with photos stored on external media, so there’s no need to fill the device’s internal memory with photos.

Do you want to master Capture One?
You can buy my e-book Capture One: Work Effectively — a complete guide to this professional photo management and editing application. The well-organized content helps you master the entire process, from importing and organizing photos to editing, managing metadata, and finally printing or exporting.
It also includes tips for those switching from other tools like Adobe Lightroom, as well as a detailed description of my own workflows that I’ve refined over years of using Capture One to process my photos.
The e-book is available in formats suitable for e-book readers and as a more than 400-page PDF.